Category: Recipes

  • Amala Lafun Troubleshooting: Why Your Láfún Turns Lumpy, Too Sour, or Watery (and How to Fix It)

    Amala Lafun Troubleshooting: Why Your Láfún Turns Lumpy, Too Sour, or Watery (and How to Fix It)

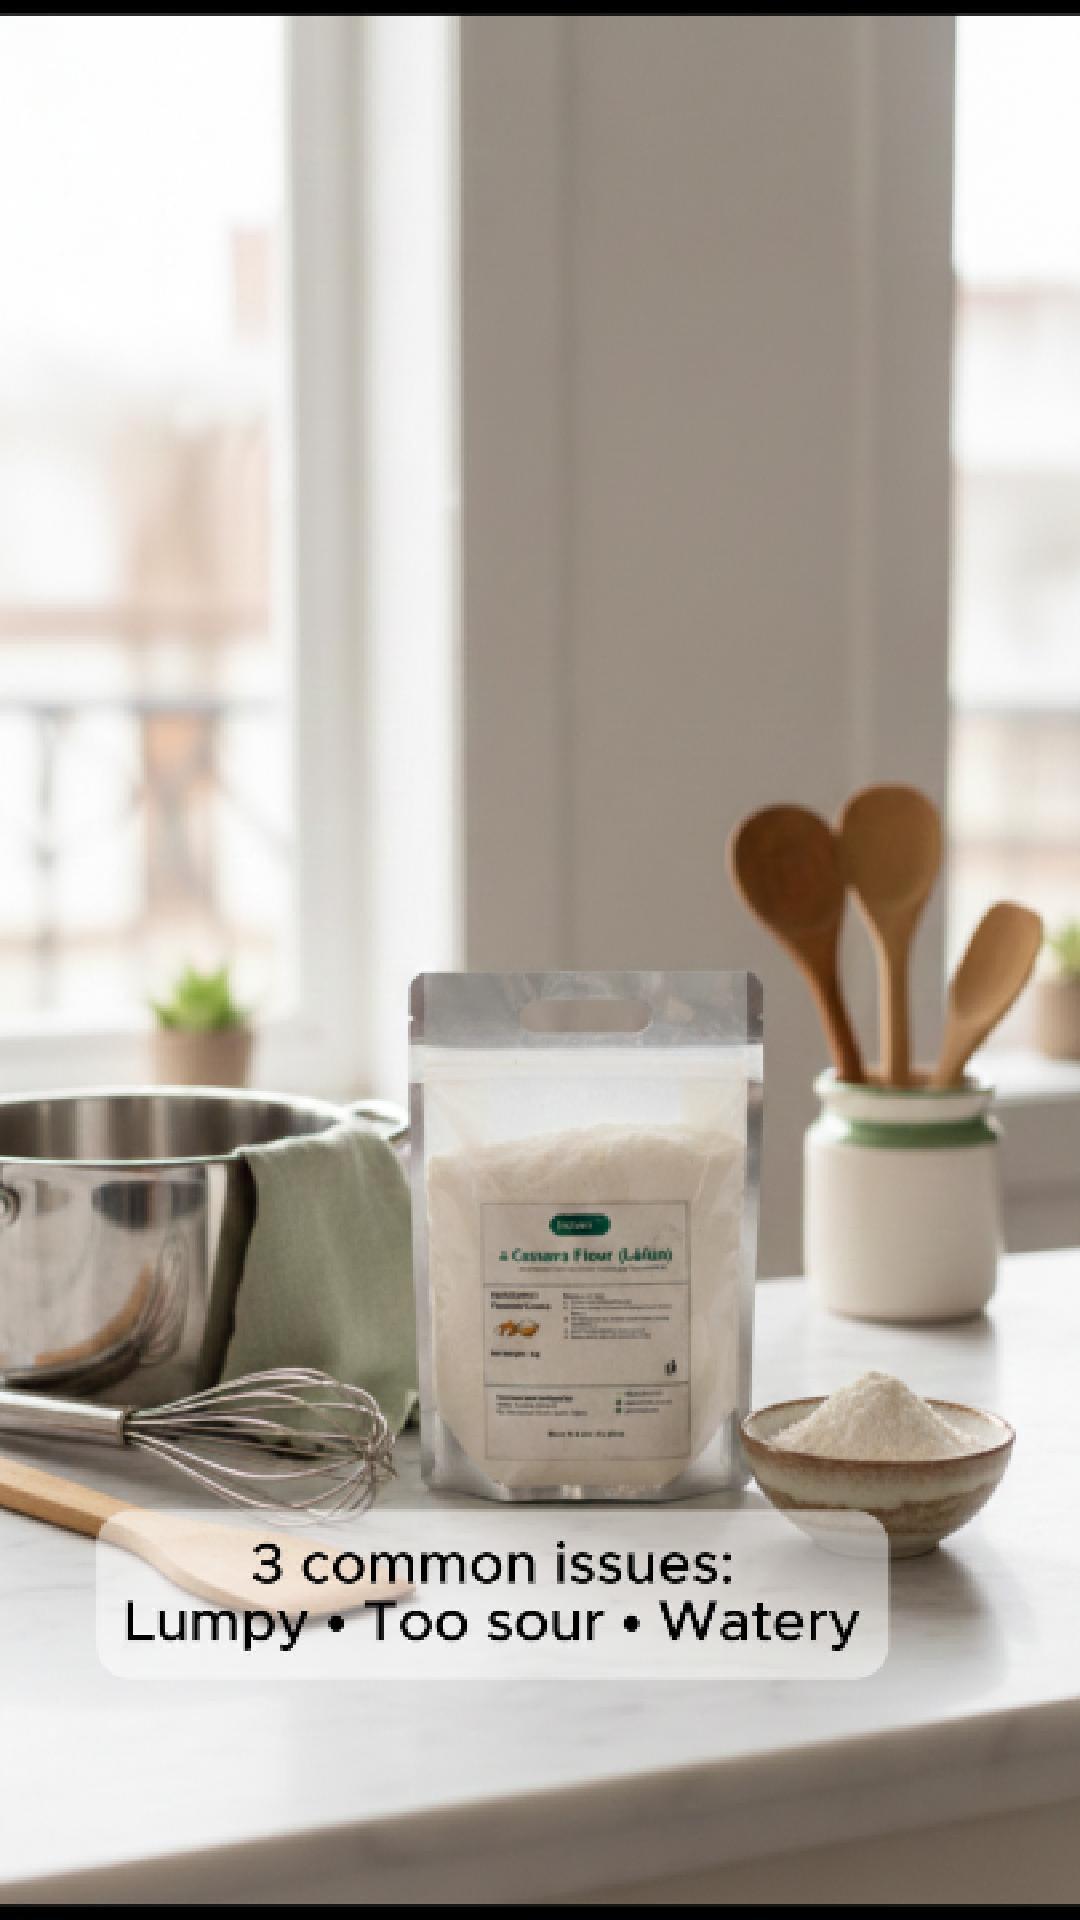
    If your amala lafun has ever come out lumpy, too sour, or watery, you’re not alone. Láfún (lafun) is fermented cassava flour—so it behaves a little differently from other swallows. The good news? You don’t need magic. You need the right heat, the right “pour style”, and one or two rescue tricks.

    This post is a save-and-use guide: quick fixes first, then simple prevention so your next pot is smooth from the start.


    What you’ll need (simple)

    • Láfún (fermented cassava flour) – finely milled works best
      Buy here: https://greenunison.com/product/nature-powered-lafun/
    • Water
    • A balloon whisk (or sturdy fork)
    • Pot + wooden spatula/turning stick
    • Optional: a pinch of salt

    Want to browse all flour options?
    Shop flours: https://greenunison.com/shop/flours/
    Full shop: https://greenunison.com/shop/


    The quick method for smooth amala lafun (lump-free)

    This is the fast, repeatable method when you want smooth amala without drama.

    Step 1: Get the water properly hot

    Bring water to a rolling boil, then reduce to medium heat (still steaming/hot, not raging).
    Why it matters: lafún needs enough heat to hydrate and “set” smoothly.

    Step 2: Whisk first, then sprinkle like rain

    Keep your whisk moving and sprinkle the lafún gradually—don’t dump it in one go.
    You’ll see it thicken quickly.

    Step 3: Switch to spatula and “turn” to finish

    Once it gets thick enough that whisking feels heavy:

    • switch to your wooden spatula
    • press + fold + turn until smooth
    • cover for 30–60 seconds (optional), then give one final smooth turn

    Serve immediately with your favourite soup.


    Quick ratio guide (start here, then adjust)

    Flour fineness and your preferred firmness can change the exact feel, so use this as a reliable starting point:

    • 1 cup lafún : 2–2½ cups water → classic swallow texture
    • Prefer it softer? add hot water 1–2 tablespoons at a time while turning.
    • Too soft? sprinkle a little more lafún and turn until it firms up.

    Tip: Always adjust with hot water, not cold—cold water shocks the texture and can bring back lumps.


    Troubleshooting (save this section)

    1) “My amala is lumpy” — why it happens + the fast fixes

    Why it happens

    • You poured flour too quickly (the outside gels before the inside hydrates)
    • The water wasn’t hot enough
    • Whisking stopped too early

    Fix now (pick one)

    Option A: Hot-water rescue (fastest)

    1. Take the pot off heat.
    2. Add 2–4 tbsp hot water.
    3. Whisk aggressively for 20–30 seconds.
    4. Return to medium heat and turn smooth.

    Option B: Press & turn
    Use your spatula to press lumps against the pot side while turning.
    This breaks the clumps and smoothens the texture.

    Option C: Beginner-safe slurry method (next time)
    If lumps keep happening, do this:

    • Mix a small portion of lafún with a little cool water to make a thin slurry (no lumps).
    • Pour the slurry into hot water while whisking, then add remaining lafún gradually.

    Prevent next time (the “3 rules”)

    • Keep water hot (medium heat, steaming)
    • Whisk continuously before it thickens
    • Sprinkle lafún gradually—never dump

    2) “It smells/tastes too sour” — what’s normal vs what’s a red flag

    First: a quick reality check

    Láfún is fermented, so a mild tangy aroma is normal. But sharp sour, musty, or “something is wrong” smells usually point to storage/moisture issues.

    If it’s just “too tangy” (but still clean)

    Try this:

    • Cook for an extra 60–90 seconds while turning (it helps reduce raw/strong aroma).
    • Pair with a rich soup—strong soups balance tang better.
    • Next time, start with slightly more water (a too-thick base can concentrate aroma).

    If it smells musty, mouldy, or “off”

    Don’t try to rescue it. Discard it.
    Signs to watch for:

    • Damp clumps that don’t break easily
    • Musty odour
    • Any visible mould or unusual colour

    Prevent sour/off smells (simple habits that work)

    • Keep lafún sealed tightly after every use
    • Store in a cool, dry cupboard, away from steam (kettle/cooker area)
    • Use dry spoons only (no wet cups, no damp hands)

    For a detailed storage guide that covers moisture, odours and pantry pests, read:
    https://shop.greenunison.com/flour-pap-storage-guide-to-beat-weevils-moisture-odours/


    3) “My amala is watery / too soft” — why it happens + how to firm it up

    Why it happens

    • Too much water at the start
    • Not enough cooking time (it hasn’t properly set)
    • You added water late and didn’t turn long enough afterwards

    Fix now

    1. Put the pot back on medium heat.
    2. Sprinkle lafún little by little, turning each addition in fully.
    3. Cover for 1 minute to steam, then give a final turn.

    Don’t rush. Watery amala needs heat + turning time to become cohesive.

    Prevent next time

    • Start within the ratio range (1 cup : 2–2½ cups water)
    • Keep heat at medium once flour goes in
    • If you must add water, add hot water in small splashes and turn properly

    Common mistakes (and the easy swap)

    • Dumping the flour in one go → sprinkle gradually
    • Stopping whisking too early → whisk until it thickens, then switch to spatula
    • Heat too high → medium heat gives smoother results
    • Using a light pot → a heavier pot reduces scorching and helps texture

    FAQs

    Can I fix amala lafun after it has cooled?

    You can, but it’s never as perfect as fresh. Reheat on low heat with a small splash of hot water, cover briefly, then turn until smooth.

    Is lafún the same as fufu powder?

    They’re both cassava-based, but lafún is typically fermented with a more distinct aroma.
    If you prefer a milder, neutral swallow, try: https://greenunison.com/product/nature-powered-fufu-powder/

    How do I store lafún so it doesn’t clump or smell off?

    • Seal airtight after every use
    • Keep it cool and dry (away from steam)
    • Use dry utensils only
      Full guide: https://shop.greenunison.com/flour-pap-storage-guide-to-beat-weevils-moisture-odours/

    Related reads (if you love smooth, lump-free swallows)

    • Plantain flour swallow troubleshooting: https://shop.greenunison.com/plantain-flour-amala-3-minute-whisk-method/
    • Corn flour swallow (tuwo) for beginners: https://shop.greenunison.com/tuwo-masara-smooth-corn-flour-swallow/
    • Corn flour baking ideas: https://shop.greenunison.com/corn-flour-bread-without-wheat/

    Call to action (order in 30 seconds)

    Want the easiest start (fine, smooth lafún that cooks evenly)?

    • Buy Lafun on the website: https://greenunison.com/product/nature-powered-lafun/
    • Browse all flours: https://greenunison.com/shop/flours/
    • WhatsApp catalogue: https://wa.me/c/2348103043789
    • Chat to order (prefilled):
      https://wa.me/2348103043789?text=Hi%20Green%20Unison%20%F0%9F%91%8B%20I%20want%20to%20order%20Nature%20Powered%20Lafun%20for%20smooth%20amala.%20Please%20share%20your%20best%20ratio%20and%20delivery%20options.%20Thank%20you!

    Save this post—next time amala misbehaves, you’ll fix it in one scroll
  • How to Make the Perfect “White” Amala (Láfún) – Step-by-Step (and Why Colour Matters)

    Picture a lively family gathering. Two steaming bowls of amala sit on the table – one dark brown, the other almost white. The elder aunties playfully argue over which one tastes better. If you grew up in a Yoruba household, you know this friendly debate well. The truth is, amala isn’t just one thing; it comes in different colours with their own stories. Today, we’re diving into “white” amala, locally called lafún, and why its colour matters for both tradition and taste. Along the way, you’ll learn how to make this cherished swallow step-by-step, so you can recreate that smooth, stretchy goodness in your own kitchen.

    A Tale of Two Amalas: White vs. Black

    In Nigerian cuisine, amala actually comes in two main types, fondly distinguished by colour:

    • White amala (lafún): Creamy off-white in colour when cooked, made from fermented cassava flour. Its light hue comes from using peeled and sun-dried cassava. Lafún has a slightly tangy aroma from fermentation, which many have grown to love with rich soups.
    • Black/brown amala: Deep brown or nearly black when prepared, usually made from yam flour (elubo isu) or sometimes unripe plantain flour (elubo ogede). This is the classic amala most people know, loved for its earthy flavour.

    Why does colour matter? Culturally, the colour tells the story of its ingredient:
    Láfún’s pale colour signals cassava’s presence – a clue for those at the table that this isn’t the usual yam amala. In many Yoruba homes, seeing that light-coloured mound means a special treat or a change of pace from the norm. Also, properly processed lafún flour (like the kind that’s peeled and finely milled) yields a beautiful creamy swallow. In fact, if your lafún comes out grayish or speckled, it might mean the cassava wasn’t fully peeled or clean – a sign of lower quality flour. So yes, colour is a quick quality check!

    And here’s a fun bit of food lore: lafún is often mistaken for its “cousin,” pupuru, which is another traditional cassava swallow. Pupuru is also light in colour, but it’s smoke-dried, giving it a distinct smoky taste and less stretch. Lafún, on the other hand, is sun-dried, preserving a neutral taste and that signature stretchiness amala is known for. So, when you hear “white amala,” remember it’s our good friend lafún – and its colour is part of what makes it unique.

    Ingredients You’ll Need

    Making white amala is delightfully simple. Ensure you have:

    • Láfún (fermented cassava) flour – about 1 cup for a family-serving (4 wraps). Use quality, fine-milled lafún like our Fermented Cassava Flour (Láfún) for the smoothest result.
    • Water – around 2 to 2.5 cups of water per cup of flour (you may adjust for consistency).
    • A whisk or wooden turner (omo olo) – for stirring. A whisk helps prevent lumps.

    Pro Tip: Good lafún flour is key. A finely milled, clean cassava flour will give you a silky amala with that lovely white-cream colour. Low-quality flour might clump or taste off. If you’re looking for trusted quality, check out our farm-processed lafún in the shop – hygienically fermented and peeled for purity.

    Step-by-Step: How to Prepare White Amala (Lafún)

    Making amala lafún is more of an art than an exact science, but follow these steps and you’ll get a perfect, lump-free swallow every time:

    1. Boil the water: Pour your measured water into a pot and bring it to a rolling boil. Once boiling, reduce the heat to medium. (Reducing the heat prevents the flour from cooking too abruptly on contact, which can cause lumps.)
    2. Start whisking in flour: Gradually whisk in the lafún flour into the hot water. Sprinkle it in little by little with one hand while stirring swiftly with a whisk or wooden spoon in your other hand. This continuous motion is the secret to a smooth consistency.
    3. Stir vigorously: As the mixture thickens, put some arm into it! Switch to a wooden turner (or keep whisking) and stir firmly and quickly. You’ll see the lafún dissolve into the water and form a thick dough. Keep mixing to break up any tiny lumps and to evenly cook the flour.
    4. Adjust consistency: Once it starts coming together, gauge the texture. If it feels too stiff (hard to turn), sprinkle a bit more hot water and stir it in. If it’s too soft or runny, add a little more lafún flour gradually. The goal is a stretchy, doughy consistency that can form a mound without running off the spoon.
    5. Steam on low heat: Now that it’s mostly formed, you can cover the pot and turn the heat to low for about a minute. This steams the amala so every bit of flour cooks through. (No one likes an “uncooked” flour taste!)
    6. Give a final turn: Uncover and give it a final strong stir/turn from bottom to top. You should have a smooth, thick amala that pulls away from the pot easily. The colour should be a pleasant off-white and uniform.
    7. Serve and wrap: Quickly scoop the hot white amala onto a plate or into a plastic wrap. Wetting the spoon or scoop slightly can help prevent sticking. Form it into your preferred shape (traditionally a rounded mound). Serve immediately while hot.

    And that’s it – you’ve made perfect white amala!

    Extra Tips for Lump-Free Lafún

    • Steady does it: Don’t dump the flour in all at once. Gradual addition is key to avoid those annoying lumps. Think rain shower, not snowball.
    • Use a whisk for the first mix: Especially if you’re a beginner, a whisk helps distribute the flour quickly in the hot water. You can switch to the traditional wooden paddle once it thickens.
    • Pre-mix trick: Some cooks mix a few tablespoons of lafún flour with cold water in a separate bowl to form a runny paste before adding any flour to the pot. Then pour this slurry into the boiling water, stir, and proceed with adding the rest of the flour. This can help eliminate lumps right from the start.
    • Quality flour matters: As mentioned, work with finely milled, clean cassava flour. Our Nature-Powered Lafun is peeled and low-heat dried, which gives a lighter colour and smoother texture than many market versions. No need for sieving – it’s ready to go.
    • If lumps happen, don’t panic: Simply keep the heat on low, add a tiny splash of hot water, and press the clumps against the pot’s side to dissolve them. Vigorous turning will usually smooth things out.

    Serving Your White Amala

    The beauty of amala lafún is how well it goes with a variety of soups. In fact, white amala is a classic companion to Yoruba soups like ewedu (molokhia soup) often teamed with gbègìrì (bean soup). That trio – white amala, ewedu, and gbegiri – creates a flavour harmony that’s hard to beat. Of course, you can enjoy lafún with efo riro (spicy spinach stew), ogbono soup, egusi melon soup, or even okra (ilà) soup. Its mild taste and springy texture make it a perfect canvas for rich, flavorful soups.

    As you dish out your perfectly made white amala, don’t be surprised if someone asks, “Why is it so white?” – you now have the answer ready. It’s the lovingly fermented cassava and careful processing that keeps it light. You might even impress them with the pupuru vs. lafun trivia!

    Ready to give it a try? If you haven’t already, grab some premium-quality lafún from our store. We take pride in offering farm-fresh, hygienically prepared cassava flour that yields a smooth, delicious amala every time. You can get it delivered fast to your doorstep – check out the Fermented Cassava Flour (Láfún) on our shop and start cooking.

    Curious about other swallows? You might enjoy our guide on making amala ogede (plantain amala) for a nutritious twist – see Plantain Flour Amala: The 3-Minute Whisk Method for more kitchen inspiration. And if you have any questions or need help, we’re here for you – chat us on WhatsApp and let’s talk food!


    Enjoy your delicious white amala, served with love and a story. As we say, the joy of Nigerian cooking is in both the process and the sharing. So, share this recipe with family & friends, and let the taste (and colour) spark a fun conversation at the dining table. Happy cooking!

  • How to Make Moi Moi with Beans Powder: An Easy Step-by-Step Guide

    Moi moi – that beloved steamed bean pudding – is a Nigerian classic known for its rich taste and high protein content. Traditionally, making moi moi involves soaking, peeling, and blending beans, which can be time-consuming. But what if you could skip those tedious steps? Beans powder (also known as bean flour) is the convenient alternative that lets you make moi moi without the overnight soaking or heavy blending. In this guide, we’ll walk you through how to use beans powder to prepare soft, delicious moi moi the easy way, while retaining all the goodness and flavour of the original recipe. It’s warm, informative, and perfect for both beginners and busy home cooks looking to save time. Let’s get started!

    Why Beans Powder for Moi Moi?

    Using beans powder in place of whole beans is a game-changer for making moi moi. Here’s why more people are embracing this no-soak method:

    • Time-Saving: No need to soak beans overnight or spend ages peeling off skins. Beans powder is ready to mix, cutting prep time dramatically. This means you can satisfy that moi moi craving faster.
    • Convenience: With bean flour, you avoid the messy blending step. Just add water to the powder and it transforms into a smooth batter. Perfect for busy cooks or anyone without a strong blender.
    • Consistency: High-quality beans powder (like the finely milled, dehulled one from Green Unison) gives a smooth, lump-free batter. The result? Moi moi with a nice, even texture – no random bean chunks!
    • Nutrition Intact: Beans powder is simply processed beans – you still get the protein, fiber, and nutrients of beans. It’s a healthy choice that doesn’t compromise on the wholesomeness of the dish.
    • Year-Round Availability: Dried beans powder stores well, so you can make moi moi anytime without worrying if you have raw beans at home. It’s pantry-friendly with a long shelf life.

    By using beans powder, you’re preserving the authentic taste of moi moi while simplifying the process. Now, let’s see what you need and how to do it step by step.

    What You’ll Need

    Before we dive into cooking, gather the following ingredients and tools:

    • Beans Powder (Bean Flour): about 2 cups. (This is simply dried beans milled into flour. If you don’t have any, you can order our smooth Beans Powder for the best results.)
    • Warm Water: about 3 cups, to mix with the powder (roughly 1.5 cups of water for every 1 cup of beans powder).
    • Onion: 1 medium, blended or finely chopped. Onion adds great flavor to moi moi.
    • Fresh Pepper: to taste (e.g. 1–2 scotch bonnets or chilli peppers, blended). Adjust to your heat preference.
    • Ground Crayfish (optional): 1–2 tablespoons for extra depth of flavor, if you like that classic taste.
    • Seasoning: Salt (about 1 teaspoon or to taste) and seasoning cubes or powder as desired.
    • Vegetable Oil: 2–3 tablespoons (for richness and to prevent sticking). Palm oil can also be used for a traditional flavour, or mix both oils.
    • Extras (optional): You can add sliced boiled eggs, deboned fish, or corned beef when assembling the moi moi for a richer meal – just like in the traditional version. (Totally optional, but a common way to enjoy moi moi!)
    • Containers for steaming: Moi moi plates, aluminum foil bowls, ramekins, banana leaves (for that authentic taste), or even heat-safe nylon bags. Anything that can hold the batter while steaming.
    • Steamer or Pot: A large pot with a tight lid for steaming. You’ll also need some water in the pot and maybe a base (like a rack or foil at the bottom) to keep the moi moi containers out of direct water.

    Step-by-Step: How to Prepare Moi Moi with Beans Powder

    Now, let’s go through the process of mixing and cooking. Making moi moi with bean flour is quick and straightforward. Follow these simple steps:

    1. Mix the Beans Powder with Water: In a bowl, combine your beans powder with warm water. Use the ratio of roughly 1 cup beans powder to 1.5 cups water. Pour the water gradually as you stir. Whisk thoroughly to dissolve the powder and form a smooth batter. (Tip: Start with half the water and mix into a paste, then add the rest. This helps prevent lumps.) You’re aiming for a consistency like pancake batter – not too thick or too runny. If it’s too thick, add a little more water; if too thin, sprinkle a bit more powder. There’s no soaking needed, but allow the batter to sit for about 5 minutes after mixing. This helps the flour hydrate properly and any tiny lumps will dissipate.
    2. Add Blended Onion and Pepper: Blend your onion and fresh pepper together into a smooth paste (you can add a little water to help it blend). Stir this mixture into the beans batter. The onion and pepper not only give moi moi its savory, delicious taste and appetizing aroma, but also a bit of color (especially if using red pepper). If you’re using ground crayfish, add it now as well. Mix everything well so the flavours are evenly distributed.
    3. Season the Batter: Add salt to taste (about 1 teaspoon for this quantity, but you can adjust) and your seasoning cube/powder if using. Also pour in the vegetable oil (2–3 tablespoons) and stir thoroughly. The oil enriches the moi moi and makes it moist. Your batter should be smooth and moderately thick at this point, with all ingredients well combined. Quick check: scoop a spoonful – it should pour relatively easily but still coat the spoon. If it feels too thick (like paste), you can stir in a bit more water. Remember, a well-mixed batter is key to moi moi that sets nicely and has a uniform texture.
    4. Prepare Steaming Containers: Get your moi moi containers ready. If you’re using plastic or aluminum molds, lightly grease them with a little oil to prevent sticking. If using banana leaves, soften them by briefly heating or blanching so they don’t tear, then fold into a cone or pocket shape. Give your steaming pot some love too: add water to the pot (about 1–2 inches depth) and put a base/trivet at the bottom. Start heating the water on medium heat so it’s simmering by the time you’re ready to cook.
    5. Portion and Add Extras: Stir the batter one more time (ingredients may settle a bit). Now ladle the batter into your chosen containers or the folded leaves. Fill each container about 3/4 full to allow room for the moi moi to expand a little as it cooks. If you want to add extras like a slice of boiled egg or bits of fish, now’s the time: place them into each portion of batter, gently submerging so they’re covered. Everyone loves finding a “surprise” egg or fish in their moi moi! 🥚🐟😋
    6. Steam the Moi Moi: Place the filled containers into the pot of simmering water, on the rack or foil base (they should not be completely submerged in water; the steam does the cooking). Arrange them so they are upright and not too tightly packed (steam should circulate). Cover the pot with its lid. If the lid isn’t tight, you can cover the pot with foil first then the lid, to trap steam. Steam for approximately 45–60 minutes. The cooking time can vary based on the size of your moi moi portions and the intensity of your stove. Avoid peeking too often to keep the steam trapped, but do check the water level halfway through – add hot water if needed to prevent burning the pot.
    7. Check for Doneness: After about 45 minutes, you can test one. Insert a toothpick or knife into the center of a moi moi – if it comes out mostly clean (no wet batter), it’s done. The moi moi should have changed from a pourable batter to a firm, solid pudding that holds its shape. The top will look set and might have slightly pulled from the container sides. If it’s not yet firm, steam an additional 5-10 minutes and check again. Overcooking can make it a bit dry, so once it’s set, take them off the heat.
    8. Cool and Serve: Using tongs or a cloth (careful – it’s hot!), remove the containers from the pot. Let the moi moi cool for a few minutes so they firm up further and are easier to handle. Moi moi can be enjoyed warm or at room temperature. Gently unmold from containers or unfold the leaves, and serve your delicious moi moi on a plate. It should be moist, orange-brown in color, and fragrant with the onions and pepper you added. Yum!

    Tips for the Best Moi Moi Results

    • Mixing is Key: To avoid lumps in your batter, remember to whisk gradually when combining beans powder and water. Starting with cool or lukewarm water, as opposed to very hot, can help you achieve a smoother mix. A whisk or even a hand mixer can make this super easy. No one likes biting into dry flour pockets, so mix well!
    • Consistency Matters: If your first attempt comes out a bit too soft or too firm, adjust the water ratio slightly next time. A thicker batter (less water) yields a firmer moi moi, while a looser batter (more water) yields a softer result. Aim for that happy medium – typically the 1:1.5 powder-to-water ratio is on point.
    • Boost the Flavor: Moi moi made with bean flour has the same authentic taste as the traditional method. Make it even better by ensuring you season well. Don’t skip the onions, peppers, and salt. A teaspoon of vegetable bouillon or stock powder can elevate the taste too. And if you enjoy the aroma of banana leaves, by all means use them as wrappers – they infuse a subtle earthy flavor you can’t get from plastic or metal containers.
    • Avoid Water Logging: Be careful not to get water into your moi moi while it’s steaming (that can make it mushy). That’s why we keep the containers above the water level. If you’re using leaves or flimsy covers, you can wrap the top of each moi moi with foil or banana leaf to prevent dripping condensate. Also, keep that steam steady – a gentle simmer is better than a rolling boil (which could splash water into the food).
    • Cooking in Batches: If you have more batter than space in your pot, you can cook in batches. Don’t try to overfill the pot. The batter can actually sit out for a bit waiting its turn – it won’t spoil at room temperature for the duration of one batch (just give it a stir before ladling again).
    • Serving Ideas: Moi moi is very versatile. It’s filling enough to eat on its own as a light meal or snack. Often, it’s served alongside pap (ogi/akamu), custard, or garri for breakfast. It’s also a great side with Jollof rice or fried rice at parties, or with a salad for a fit-fam combo. However you enjoy it, know that you’ve made a wholesome dish in a fraction of the usual time!

    In Conclusion…

    Making moi moi has never been this quick and stress-free. By using beans powder, you’ve skipped the hardest parts of the traditional method while still enjoying a nutritious, home-cooked delicacy. The texture is soft and moist, the flavor is spot on, and you didn’t have to haul out a heavy grinder or spend hours in the kitchen. Modern hacks meet traditional taste – what’s not to love?

    If you’re excited to try this out, we’ve got you covered. Green Unison’s Nature-Powered Beans Powder is perfect for this recipe – finely milled from dehulled beans, with no additives, giving you a pure and smooth batter every time. You can get it easily from our shop and have it delivered to your doorstep.

    Ready to cook smarter, not harder? 🛒 Order our Beans Powder here for a convenient moi moi experience. We deliver fast, so you can start enjoying hassle-free cooking. Have questions or need to chat before buying? 💬 Chat with us on WhatsApp – we’re here to help!

    We hope this guide answers all your questions about using beans powder for moi moi. Feel free to share your own moi moi-making experiences or any tips you discovered along the way. Have fun cooking, and enjoy every delicious bite of your easy homemade moi moi!

    Related Post: Curious about other quick bean recipes? Check out our article on No-Soak Akara in Minutes (another Nigerian breakfast favorite made easy with beans powder). Happy cooking!

  • How to Turn Fufu Powder into Smooth, Stretchy Swallow (Without Turning It to Glue)

    Have you ever made fufu from instant powder, only to end up with a sticky, glue-like blob or stubborn lumps? Don’t worry – you’re not alone, and we’ve got you covered. Fufu (cassava swallow) is a beloved staple, but getting that perfectly smooth, stretchy texture from fufu powder can be tricky if you don’t know the right technique. In this guide, we’ll walk you through how to mix fufu powder so you get soft, lump-free swallow every time – no gluey mess, no stress. Grab your pot and let’s fix those fufu woes!

    Why Does Fufu Sometimes Turn Out Like Glue?

    If your fufu feels more like super glue than a smooth swallow, a few usual suspects are likely at play:

    • Too Much Water: Using excess water can make fufu overly soft and sticky. Cassava is full of starch, so too high a water-to-powder ratio turns it into a gloopy paste.
    • Too Little Water (or Heat): Ironically, the opposite can also cause issues. Not enough water or letting the mixture dry on high heat can lead to lumps and uneven cooking, making parts of the fufu gluey while other parts stay raw or clumpy.
    • Poor Mixing Technique: Dumping powder in all at once or not stirring properly will create lumps. Those lumps have dry powder inside, which never fully cooks – leading to a lumpy, sticky texture.
    • Wrong Powder or Quality: Coarse or low-quality fufu flour might not incorporate smoothly. A finely milled, well-processed powder (like our own Green Unison Instant Fufu Powder) is less prone to lumps and cooks into a better texture.

    The good news? By adjusting your method, you can avoid all these issues. It’s mostly about the right water ratio, heat control, and constant stirring. Let’s dive into the step-by-step solution for a perfect, non-gluey fufu.

    How to Make Smooth, Stretchy Fufu from Powder (Step by Step)

    Making fufu powder into a smooth swallow is easy once you get the hang of it. Here’s how to do it:

    1. Boil the Water First (But Don’t Overdo It)

    Start with fresh, clean water in your pot – about 2 to 2.5 cups of water for each cup of fufu powder. This ratio gives a good consistency (you can adjust as you learn your preferred thickness). Bring the water to a rolling boil first. Boiling water is key to cooking the cassava starch quickly and evenly. However, don’t keep it at a furious boil once it’s bubbling – extremely high heat can scald the fufu and create lumps.

    Pro Tip: As soon as the water boils, reduce the heat to medium (or even low). You want the water hot but not erupting when you start adding the powder. This controlled heat will cook the fufu without burning it.

    2. Add Fufu Powder Gradually While Stirring

    Now, grab a sturdy wooden spoon or a whisk. (We love using a whisk at the start for lump-free results – it’s a game-changer!) Slowly pour the fufu powder into the hot water in a steady stream, little by little, while stirring vigorously. This gradual addition helps to “scatter” the powder into the water so no clumps form.

    If you dump all the powder at once, you’ll get big lumps that are hard to dissolve. So be patient – add a bit of powder, stir until it’s incorporated, then add more. Keep the pot on medium heat as you do this; too high and the mixture might cook too fast on the bottom, too low and it won’t cook at all.

    Keep stirring constantly with your spoon/whisk. You’ll notice the mixture thickening gradually into a dough-like consistency as the powder absorbs water.

    3. Stir Continuously (Switch to a Wooden Spoon When Thick)

    Once all the powder is in and it starts to form a thick consistency, it’s muscle time! Stir, fold, and turn the fufu in the pot continuously. At this stage, a wooden spoon (or the traditional “turning stick”) works better than a whisk because the fufu is now heavy and stretchy.

    Press the fufu against the sides of the pot as you stir to squash any small lumps. Keep the heat on low-to-medium to ensure the fufu cooks through without burning. You’ll notice it becoming smoother with each turn. This step usually takes just a few minutes – you’re basically “kneading” the fufu in the pot with your spoon.

    Pro Tip: If you see any tiny lumps, don’t panic. Keep the spoon moving and apply a bit of pressure against the pot – those lumps will melt away into the hot fufu. Consistent stirring is what transforms the mix into that coveted smooth, stretchy ball.

    4. Adjust the Consistency (Water or Powder Fixes)

    After a few minutes, evaluate the texture. This is where you tweak to get your perfect swallow:

    • If the fufu is too thick or hard (difficult to turn, feels stiff or dry): Sprinkle a little hot water around the edges of the pot. Fold it in and stir. The hot water will incorporate and soften the dough. Add water in small increments (a few tablespoons at a time) so you don’t overshoot and turn it to mush.
    • If the fufu is too soft or sticky (gluey): This means there’s excess moisture. You can rescue it by adding a tiny bit more fufu powder and quickly working it in. Just a tablespoon or two can firm up a overly soft fufu. Keep the heat on low while you do this so the new powder cooks in.
    • If lumps are appearing (small dry clumps): You likely added powder too fast or didn’t stir enough initially. No worries – add a splash of water and cover the pot for about 30 seconds to a minute. This can help steam and soften the lumps. Then uncover and vigorously beat the fufu with the spoon to break the lumps apart. (Wear oven mitts or use a cloth to hold the pot – it might jiggle.) In future, remember to whisk and stir from the get-go to prevent lumps.

    By adjusting with a bit more water or powder, you can fine-tune the fufu’s feel. Eventually, you’ll get a sense of your ideal texture – some like it very soft and almost stretchy-sticky (but not uncooked or gluey), others prefer it a tad firmer.

    5. Know When It’s Ready

    You’ll know your fufu is ready when it’s smooth in appearance, free of lumps, and has a bit of stretch to it. It should pull away slightly from the sides of the pot as you stir, forming a nice cohesive mass. Another sign: the color usually changes to an off-white and loses the raw cloudy look, indicating it’s well cooked.

    Traditionally, people will mould it into a ball at this point. You can do this by scooping it out onto a plate and using a plastic wrap or latex gloves to shape it – careful, it’s hot! Once balled, you might see a slight sheen on the surface; that’s a good sign of smoothness and stretch.

    If you’re not sure, taste a tiny bit (careful, let it cool) – it should taste cooked (no raw starchy taste) and have a nice smooth mouthfeel with no floury lumps.

    Congratulations, you’ve just made a perfect swallow from fufu powder! Time to get that soup ready.

    Extra Tips for Lump-Free, Non-Sticky Fufu

    • Use a Whisk for the First 1-2 Minutes: We can’t say this enough – a whisk is excellent for combining the powder and water initially. It breaks up clumps quickly. Once the fufu thickens, switch to a wooden spoon to finish it off. This two-tool approach is our secret weapon for super smooth fufu. (In fact, we even used this trick for lump-free plantain amala – check out our 3-minute whisk method for plantain flour amala for a similar hack!).
    • Steady, Moderate Heat: Resist the urge to cook on high heat the whole time. High heat can cause uneven cooking – you’ll get a burnt bottom and raw top (gluey!). Medium heat while stirring, and low heat when adjusting consistency, works best to cook the fufu evenly without scorching.
    • Quality of Powder Matters: A well-processed, finely milled cassava flour will give a smoother result. Our Instant Fufu Powder is designed for easy, lump-free mixing – it’s finely milled and properly fermented/dried, so it cooks fast and smooth. Cheaper or raw cassava flours might need more elbow grease to get similar results. If you’ve struggled with those, it might be time to upgrade to a smoother experience.
    • Work Those Arms (But Not Forever): Fufu doesn’t actually take long to cook – usually 3-5 minutes of stirring once the powder is in. If you’re stirring for 10+ minutes and it’s still not coming together, something’s off (either ratio or heat). Stop and troubleshoot (add water or powder as above). When done right, your fufu should be ready in minutes – a quick workout and you’re done!
    • Keep the Lid Nearby: If at any point you need to step away (or your arm needs a quick break), turn the heat to very low and cover the pot. The steam under the lid will keep it moist and prevent a “crust” from forming. Just don’t leave it unattended too long. When you come back, you may find some water on top – simply stir it in. Covering for a short moment can also help cook out any remaining tiny lumps as mentioned earlier.

    By following these tips, you’ll be dishing out swallows that make you do a little happy dance at dinnertime. No more hiding a sticky fufu disaster under a mountain of soup – you’ll have that smooth, elastic texture that’s perfect for scooping up your favorite soups (Egusi, Efo Riro, Ogbono – bring them on! 😋).

    Common Mistakes to Avoid (Your Fufu No-Glu Squad)

    To recap, keep an eye out for these common mistakes when preparing fufu from powder, and you’ll save yourself from a lot of “swallow sorrow”:

    • Adding Powder Too Fast: This is the #1 culprit for lumps. Always pour gradually and whisk/stir while adding.
    • **Using *Way* Too Much Water:** Eyeballing water and accidentally using far more than a 2:1 ratio can make a pot of paste. Measure your water, and remember you can always add a little more if needed, but you can’t easily take it out.
    • High Heat All Through: Blasting the stove on high will cook the bottom layer to death while the top is still raw. It often leads to a lumpy, gooey mix. Start high to boil, then always reduce heat when mixing and finishing the cook.
    • Neglecting the Stirring: We get it, your arm might ache, but constant stirring (for those few critical minutes) is what works the magic. Stopping too early or stirring lazily will result in lumps and uneven texture. Tag team with someone if you need a break – it’s worth it!
    • Using a Wet Spoon from the Start: This is a subtle one – make sure your stirring spoon is dry when you begin. Introducing water drips while adding powder can create instant tiny clumps. Keep things dry until everything is well mixed. Then you can sprinkle water later if adjusting.

    Avoid these pitfalls and you’ll dramatically increase your chances of first-time success with smooth fufu.

    From Powder to Perfection: You’ve Got This!

    Making perfect fufu from instant powder is a skill worth mastering – and now you have all the tips to do it. It might take a try or two to get your preferred consistency spot on, but even your first attempt using these steps will be miles better (and easier) than struggling in the dark. Remember, even seasoned home cooks had to learn these tricks at some point. Now you’re in on the secrets!

    So the next time it’s swallow o’clock and you’re craving that comforting mound of fufu with steaming soup, you can approach the stove with confidence. No more fearing you’ll end up with a pot of goo or a lumpy, bumpy ball. Instead, you’ll scoop out a beautiful, smooth and elastic fufu that holds together yet gently yields as you tear off a bite. That’s the texture we’re going for!

    And if you need a little help (or just want to make life easier), remember that the quality of your powder makes a difference. Green Unison’s Instant Fufu Powder is made to give you that smooth, stretchy result without the hassle. We’ve done the tedious part – peeling, fermenting, drying and finely milling the cassava – so that when it reaches your kitchen, it practically mixes itself (with a bit of whisking love from you, of course!).

    Ready to turn your fufu powder into the perfect swallow? Grab a pack of Instant Fufu Powder from our shop and give it a go! We’re excited for you to enjoy easier, quicker fufu that doesn’t turn into a glue monster.

    Have any questions or want to order directly? We’re just a message away! Feel free to reach out on our WhatsApp catalogue to see our products, or chat with us on WhatsApp to get personal assistance with your order. Simply click here: Chat on WhatsApp – we’ve even pre-filled the hello message for you. 📲💬 We deliver nationwide, so your fufu fix is just an order away.

    Enjoy your lump-free, non-sticky fufu and happy eating!

  • Corn Flour Bread Without Wheat: What You Can Make (and What You Shouldn’t)

    Ever wondered if you could bake bread using corn flour instead of wheat flour? You’re not alone. Many home bakers are exploring wheat-free, gluten-free alternatives for health or dietary reasons. Corn flour (finely milled maize) is a naturally gluten-free whole grain flour, so it’s an exciting option. But can it truly replace wheat in bread? The answer: yes, you can make some delicious things with corn flour alone, but no, it won’t behave exactly like wheat. In this post, we’ll explore what you can bake with corn flour when you skip the wheat – and what you shouldn’t attempt, to save you time and kitchen frustration.

    (Quick note: Here corn flour means whole ground corn/maize flour, not the starchy white “cornflour” used as a thickener. We’re talking about the yellow or white corn meal flour from maize grains, which is what Green Unison’s Corn Flour is. It’s naturally gluten-free with all the fibre and nutrients of whole corn.)

    Why No Wheat? Corn Flour vs. Wheat Flour Basics

    Baking without wheat is becoming popular as more people go gluten-free or experiment with local flours. Corn flour is a staple from maize – a crop we know well – so it’s an appealing wheat substitute. The key difference: unlike wheat, **corn flour contains *zero gluten***. Gluten is the protein in wheat that makes dough stretchy and traps air bubbles, giving bread that soft, risen structure. Corn flour has no gluten, which means:

    • Pros: Corn flour is gluten-free (great for those with gluten intolerance or looking to cut down on refined flour). It brings a rich, subtly sweet corn flavour and extra whole-grain fibre. It’s also locally available and affordable.
    • Cons: Without gluten, corn flour dough doesn’t have elasticity. It won’t rise and fluff up the way a wheat dough will. This doesn’t mean you can’t make any “bread” with it – but it does mean true yeast-risen bread loaves are tricky.

    In other words, corn flour can shine in certain recipes, but you need to choose the right kind of bakes. Let’s dive into those.

    What You Can Make with Corn Flour (No Wheat Added!)

    Fortunately, you can enjoy plenty of wheat-free goodness with corn flour. Here are some baked (and non-baked) creations that work well with 100% corn flour – no wheat needed:

    • Cornbread & Quick Loaves: The most famous corn flour “bread” is cornbread, a golden quick bread that’s closer to a moist cake. Cornbread doesn’t use yeast at all – instead it rises with baking powder or soda. You can mix our fine corn flour with eggs, a bit of oil, milk, a touch of sugar/honey, and baking powder to bake a lovely dense loaf or muffins. Because it’s gluten-free, the texture will be a bit crumbly (think along the lines of a cake or muffin, not a stretchy bread). Add some corn kernels, cheese or peppers for a fun twist. These corn flour loaves or muffins pair wonderfully with soups, stews, or as a snack.
    • Pancakes & Flatbreads: Corn flour makes tasty wheat-free pancakes. Just combine it with an egg (or mashed banana for vegan option), milk or water, a little oil and leavening. The pancakes will be tender with a slight crisp edge and a pleasant corn taste. Similarly, you can create simple flatbreads or wraps with corn flour. For example, mix corn flour with hot water and a pinch of salt to form a soft dough, then press or roll it into flat rounds. Cook these on a hot pan – you’ll get something like a rustic corn flatbread. They won’t be as flexible as wheat rotis or tortillas (corn flour is more brittle), but you can make small, thicker flatbreads that are great for dipping or topping. Pro tip: using a bit of cassava or tapioca starch in the mix can improve flexibility for wraps, since those starches add stretchiness.
    • Baked Snacks (Crackers & Coatings): Ever tried corn crackers? You can mix corn flour with a bit of fat and water to make a dough, roll it thin and bake into crispy corn crackers – a great gluten-free snack! Additionally, corn flour excels as a gluten-free coating for frying or baking. Use it to bread chicken or tofu, or to dust veggies before pan-frying. It gives a light, crunchy coating (think tempura-style or the way cornmeal coats fried okra). While this isn’t “bread” per se, it’s a way to replace wheat flour in recipes (like coating that normally uses all-purpose flour).
    • “Swallow” (Tuwo Masara): Outside the baking realm, corn flour’s superstar use in Nigerian cuisine is tuwo masara, the smooth corn flour swallow. Just corn flour and water, stirred over heat, turn into a smooth, dough-like meal that you eat with soup. It’s completely wheat-free and a beloved staple. (If you want to master lump-free tuwo, check out our guide on how to prepare corn flour for swallow (tuwo masara) for pro tips!)

    So yes – you can create plenty of wheatless delights with corn flour. From a pan of crumbly cornbread to a plate of hot corn pancakes or a bowl of satisfying corn swallow, corn flour is versatile. The trick is to stick to recipes that don’t rely on gluten for structure. Quick breads, unleavened breads, and anything bake-from-batter (rather than knead-and-rise dough) are your friends here.

    (Bonus: Even if you’re not cutting wheat entirely, you can still put corn flour to work by replacing a portion of wheat flour in traditional recipes. For instance, swap in about 25–30% corn flour in a muffin, pancake or bread recipe for extra fibre and flavour. Our Silky White/Yellow Corn Flour blends especially well with wheat flour in “rustic” bakes, adding a golden colour and hearty taste.)

    What You Shouldn’t Do with Corn Flour

    Now for the flipside – what not to do with corn flour if you’re trying to avoid a kitchen disaster. Some ideas sound great in theory but don’t work out well in practice due to that no-gluten issue. Here are a few “don’ts” for corn flour:

    • Don’t expect a fluffy, airy bread loaf: Without gluten, a dough made of only corn flour simply won’t rise into a soft loaf. If you tried to bake a classic sandwich bread or our local Agege bread using 100% corn flour, you’d get a dense, brick-like or crumbling loaf. Corn flour can’t trap the yeast’s air bubbles effectively, so the bread will be very heavy and likely fall apart. (In fact, bakers often say you cannot make true leavened “bread” with just corn – you’d need to add special binders like psyllium husk or extra starches, which goes beyond a simple flour swap.)
    • Don’t swap corn flour 1:1 for wheat flour in yeast recipes: Following from the above – if a recipe is designed for wheat (like a yeast-risen dough or a cake that relies on gluten structure), you can’t just use corn flour instead and hope it works. For example, don’t use corn flour in a dough expecting to knead it; it lacks the stretchy consistency and will break apart or turn paste-like. Always seek recipes specifically formulated for corn or gluten-free flours. They often compensate by using eggs, gums, extra starch, or different techniques to mimic the structure. Spontaneously substituting corn flour into a random bread recipe will end in disappointment.
    • Don’t confuse corn flour with cornstarch: This is a common mix-up, especially since in the UK, people say “cornflour” meaning cornstarch. Cornstarch is the ultra-fine white powder used for thickening sauces or making custard – it’s not whole corn flour. Never try to bake bread with cornstarch; you’ll get a gooey mess or a rock-hard result. Make sure you’re using actual corn flour (maize flour) for any of the ideas we mention here. Corn flour has the yellow (or white) colour of ground corn and contains the grain’s proteins and fibre, whereas cornstarch is just the starch (carbohydrate) part of corn. They behave totally differently.
    • Avoid purely starch-based “bread” attempts: On a related note, some might wonder “what if I add tons of starchy flour (like tapioca or potato starch) to corn flour to help it bind?” – Gluten-free bread recipes do use starches, but you still need a balance. If you somehow ended up with mostly starch and corn, you’ll get an odd, rubbery texture. Follow proven recipes if venturing into that territory. If your goal is a true bread loaf without any wheat, consider using a blend of gluten-free flours (corn, rice, sorghum, etc.) plus a binding agent and yeast – it’s possible to achieve a decent loaf, but it’s a science! For the scope of this post, we’re focusing on simpler corn-flour-only uses, because they’re much more foolproof.

    In short, don’t try to force corn flour into roles that wheat flour plays in classic baking. You’ll save yourself wasted ingredients and frustration. Embrace corn flour for what it does best (the tasty results in the previous section!), rather than expecting it to perform exactly like wheat.

    Wrapping Up: Enjoying Wheat-Free Baking with Corn Flour

    Baking without wheat can be truly rewarding when you use the right approach. Corn flour brings its own unique taste and benefits to the table – a slightly sweet flavour, lovely colour, and whole-grain nutrients – as long as you work within its gluten-free limits. Instead of a traditional bread loaf, think muffins, quick breads, pancakes, and indigenous dishes like tuwo. You’ll discover new favourites that don’t miss the wheat at all!

    Ready to try it out? Start small: maybe whip up a batch of corn flour pancakes this weekend or a simple cornbread loaf using Green Unison Corn Flour. You might be surprised how quickly your family devours these wheat-free treats. And if you’re feeling creative, experiment by combining corn flour with other flours (like a bit of plantain flour or yam flour) to create your own signature gluten-free bake – the possibilities are endless once you get the hang of it.

    Green Unison’s own Silky White/Yellow Corn Flour is finely milled and easy to use for all the ideas we mentioned. It’s a pantry must-have if you’re exploring alternative flours. You can grab a pack from our shop or even order on WhatsApp for quick pickup. We’re always here to help you make the most of these natural ingredients in your kitchen.

    Hungry for more tips? Don’t miss other guides on our blog, like How to Prepare Corn Flour for Swallow (Tuwo Masara) if you’re into traditional meals, or our upcoming posts on creative gluten-free baking. Have questions or your own corn flour experiment to share? Drop a comment or reach out – we love hearing from you!


    Ready to go wheat-free with corn flour? Browse our Flours collection for quality, locally-grown options. You can order Silky White/Yellow Corn Flour directly from our site or chat with us for quick service. Happy baking!

    CTA: Order Now – Get our premium corn flour and start baking! Shop online: Silky White/Yellow Corn Flour – Effortless Use or Chat with us on WhatsApp 👉 Click here (₦1,800 for 1 kg; same-day pickup available!). Enjoy nationwide delivery and let’s bring your wheat-free recipes to life!

  • Tuwo Masara for Beginners: Smooth, Stretchy, Lump-Free Every Time

    Prep time: 5–10 minutes
    Cook time: 10–15 minutes
    Serves: 2–3 (adjust proportions as needed)

    Tuwo Masara — a comforting corn-flour swallow — should be soft, smooth and hold together without crumbling. If you’ve had trouble with lumpy tuwo or a swallow that breaks apart, this beginner-friendly guide is for you. It focuses only on using finely milled corn flour (the kind sold for swallow preparation) and gives clear, repeatable steps that remove the guesswork.

    Why this method works: start with a thin slurry so the flour disperses evenly, cook a stable base, then add the remaining flour slowly while stirring. A final short steam ensures the centre cooks through and the tuwo binds together for a stretchy, lump-free finish.


    Ingredients & tools

    Ingredients (approximate — scale to suit):

    • 1 cup finely milled corn flour (white or yellow) — see product link below
    • 2–2½ cups water (for ~1 cup corn flour) — plus a little extra if needed
    • A pinch of salt (optional)

    Tools:

    • Heavy-bottomed pot or saucepan
    • Sturdy wooden spoon or heatproof spatula (a turning stick is ideal)
    • Small mixing bowl for the slurry
    • Measuring cup and spoon

    Order fine corn flour: Green Unison Finely Milled Corn Flour — suitable for tuwo masara and made for smooth mixing. You can also browse all our flours here: https://greenunison.com/shop/


    Quick explanation: why lumps and breakage happen

    • Dry flour dumped into hot water causes clumps that are hard to break down.
    • Coarse flour or unsieved flour doesn’t dissolve evenly, leaving a grainy texture.
    • Too little water makes a dry, crumbly dough that falls apart.
    • Insufficient cooking/steaming leaves the centre undercooked and prone to breaking.

    The instructions below address each of these issues.


    The Smooth Tuwo Method — step-by-step

    This two-stage method (slurry → gradual dry add) is the simplest and most reliable for beginners.

    1. Heat the water
      Add 2–2½ cups of water to your pot and bring to a rolling boil. Reduce heat to medium so the water is hot but not vigorously boiling (this gives you better control when adding flour).
    2. Make a thin corn-flour slurry
      In a small bowl, combine half of the corn flour (about ½ cup) with cold water to make a smooth, runny batter (think thin porridge). Mix until there are no dry pockets. This slurry prevents instant lumping when it hits the hot water.
    3. Cook the slurry into a base
      Pour the slurry into the hot water slowly while stirring continuously. The mixture will thicken quickly into a pap-like base. Stir for 2–3 minutes to cook out the raw corn taste and to form a stable foundation.
    4. Add the remaining flour gradually
      Sprinkle the remaining dry corn flour into the pot in small handfuls while stirring vigorously. After each sprinkle, work the flour in until incorporated. This gradual addition is the step that prevents lumps — patience here is key.
    5. Adjust to the right consistency
      As the mixture becomes thick, it should be moist and elastic rather than dry and crumbly. If it firms up too fast, splash in a tablespoon or two of hot water and continue stirring. Aim for a dough that pulls cleanly from the pot sides and holds shape when scooped.
    6. Steam for a few minutes
      When the mixture is smooth and homogeneous, reduce the heat to low, cover the pot and let it steam for 2–3 minutes. This finishing steam cooks the centre and helps the tuwo bind so it won’t fall apart.
    7. Final stir and shape
      Uncover, give a final vigorous stir, then scoop and mould into round portions using a wet spoon or a bowl lined with plastic. Serve hot with your preferred soup or stew.

    Ratio cheat-sheet (no scale)

    • Starter (thin slurry): ½ cup corn flour + enough cold water to make a thin batter (approx. ¾ cup cold water)
    • Boiling water: 2–2½ cups of hot water for 1 cup total corn flour
    • Adjust: Add hot water a tablespoon at a time if mixture feels too stiff while cooking

    Tip: If cooking for more people, increase flour and water proportionally — keep the slurry stage and gradual flour addition the same.


    Extra tips for success

    • Use finely milled corn flour — coarser flours can give a grainy finish. Our recommended product is designed for swallow preparation.
    • Stir with purpose: a sturdy wooden spoon helps you reach every part of the pot and prevents scorching.
    • Don’t rush adding the dry flour. Small additions and full incorporation are the secret to zero lumps.
    • If lumps appear: take the pot off the heat and vigorously stir or smash them against the pot side with the spoon, then return to the heat and continue. For small stubborn lumps, a short blender blitz (if removed and cooled slightly) can rescue a batch, but prevention is preferable.
    • Steaming matters: a brief covered cook at the end makes the tuwo cohesive and elastic. Skipping it is a common reason for crumbling.

    Serving ideas

    Tuwo Masara pairs well with rich, flavourful soups. Some popular combinations:

    • Groundnut (peanut) soup — nutty and rich
    • Egusi (melon seed) stew — hearty and spicy
    • Vegetable or tomato-based soups — for lighter pairings

    Scoop a small ball of tuwo, dip into hot soup and enjoy. For a prettier plate, use yellow corn flour for a warm golden colour.


    Storage & reheating

    • Best eaten fresh. Tuwo is softest and most pleasant hot.
    • To keep: wrap warm tuwo in cling film and refrigerate for up to 24–48 hours.
    • Reheat: sprinkle a little hot water over the portion and reheat gently on the stove with stirring until soft, or microwave briefly with a sprinkle of water — stirring halfway through.

    Frequently asked questions

    Q — Can I use cornmeal or corn starch instead?
    A — Cornmeal (coarser) will give a grainier texture; if you must use it, sieve first and accept a different mouthfeel. Corn starch is a pure starch and not suitable as the main ingredient for tuwo masara. Use a finely milled corn flour made for swallows.

    Q — How do I know the tuwo is done?
    A — The tuwo should be smooth, pull away from the pot sides, and feel elastic when you scoop it. A short steam finishes the cooking and sets the texture.

    Q — Is tuwo masara gluten-free?
    A — Yes — when made from pure corn flour, tuwo is naturally gluten-free.


    Related resources & internal links

    • Our corn flour product: Green Unison Finely Milled Corn Flour — https://greenunison.com/product/nature-powered-corn-flour/
    • Browse all flours: https://greenunison.com/shop/
    • For more behind-the-scenes reading, see our collection: Farm to Cup — Behind the Scenes of Our Dried Herbs (find related posts and guides in the blog sitemap): https://shop.greenunison.com/post-sitemap.xml
    • Want a storage guide for flours? Check our blog for flour storage tips (link to related post in your CMS when you publish).

    Ready to try it?

    Give the smooth tuwo method a go today — it’s quick, forgiving and perfect for beginners. If you’d like to order the corn flour we recommend, you can:

    • Buy online: https://greenunison.com/product/nature-powered-corn-flour/
    • Browse our shop / other flours: https://greenunison.com/shop/
    • View our WhatsApp catalogue: https://wa.me/c/2348103043789
    • Chat or order via WhatsApp: https://wa.me/2348103043789?text=Hi%20Green%20Unison!%20I%20want%20to%20buy%20your%20corn%20flour%20for%20tuwo.

    If you found this guide helpful, please leave a comment on the blog, share your finished tuwo picture, or send us a message on WhatsApp. Happy cooking!

  • Plantain Flour Amala: The 3-Minute Whisk Method (Plus How to Fix Lumps, Stickiness & Bitter Taste)

    If you’ve ever made plantain flour amala and ended up with lumps, a sticky paste, or a slightly bitter taste, you’re not alone. The good news: you don’t need a sieve, special tools, or long stirring sessions.

    This is the 3-minute whisk method we use when we want smooth amala fast—plus exact fixes if anything goes wrong.

    Best for: busy weeknights, first-timers, “I need swallow now” moments.


    What you’ll need (simple)

    • Plantain flour (finely milled works best): Nature Powered Plantain Flour
    • Water
    • A pinch of salt (optional, but helpful for taste)
    • Balloon whisk (or a sturdy fork in a pinch)
    • Pot + wooden spatula (for final smoothing)

    Want to browse all our flours? Start here: Shop Flours


    The 3-Minute Whisk Method (Lump-Free)

    Step 1: Get your water hot (30–60 seconds)

    Bring water to a boil, then reduce to medium heat (still steaming/hot, not raging).

    Step 2: Whisk first, pour flour like rain (60–90 seconds)

    Keep the whisk moving and sprinkle plantain flour gradually—don’t dump it all at once.
    You’ll see it thicken quickly.

    Step 3: Smooth & fold (60 seconds)

    Once it gets thick enough that whisking feels heavy:

    • switch to a wooden spatula
    • fold, press, and turn for about 1 minute
    • cover for 30 seconds (optional), then give it one final smooth turn

    Done. Serve immediately with your favourite soup.


    Quick ratio guide (start here, then adjust)

    Because flour fineness and personal preference vary, use this as a reliable starting point:

    • 1 cup plantain flour : 2 cups water → firm, classic swallow texture
    • Prefer it softer? add hot water 1–2 tablespoons at a time while turning.

    Tip: If you’re cooking for one, start smaller and scale up once you like your texture.


    Troubleshooting (Save this part)

    1) “I have lumps” — How to fix it fast

    Why it happens: the outside of the flour hits hot water and gels before the inside hydrates.

    Fix (choose one):

    • Hot-water rescue: take pot off heat, add 2–4 tbsp hot water, whisk hard for 20–30 seconds, then return to medium heat and turn smooth.
    • Press & turn: press lumps against the pot side with your spatula while turning.
    • Prevention for next time: sprinkle flour gradually and keep whisk moving before it thickens.

    2) “It’s sticky / gluey” — How to correct it

    Common causes:

    • too much water
    • undercooked (needs a bit more heat time)
    • too much aggressive stirring after it has set

    Fix:

    • return to medium heat for 60–90 seconds, turning gently (cooking helps it set properly)
    • if it’s still too soft, sprinkle 1–2 teaspoons of plantain flour and turn until it firms up
    • cover for 30–60 seconds to steam, then smooth once

    3) “It tastes bitter” — What’s going on?

    Plantain flour can have a naturally “earthy” note, but bitter is usually one of these:

    • flour has picked up off-flavours from heat/humidity
    • flour stored unsealed near strong smells
    • pot got too hot and the bottom scorched slightly

    Fix now:

    • add a tiny pinch of salt and serve with a rich soup (bitterness fades in balance)
    • if you suspect scorching, transfer to a clean pot and continue gently for 30 seconds

    Prevent next time:

    • store flour sealed, cool, and dry
    • avoid very high heat once thickening starts

    Common mistakes (and the easy swap)

    • Dumping flour in one go → sprinkle it gradually
    • Whisking stops too early → whisk until it’s thick, then switch to spatula
    • Heat too high → medium heat gives smoother results

    FAQs

    Can I mix with cool water first?

    Yes—if you’re a beginner, you can make a smooth slurry with a little cool water first, then pour into hot water while whisking. It’s slower, but very safe for lump-free results.

    Can I reheat leftover amala?

    Yes. Add a splash of hot water, cover, and warm on low heat. Turn once it softens.

    What to buy for this method?

    If you want the easiest, smoothest start, use a finely milled flour:


    Related reads from our blog


    Call to action (order in 30 seconds)

    Ready to make lump-free plantain flour amala this week?

    • 🛒 Buy on website: greenunison.com
    • 📦 WhatsApp catalogue: https://wa.me/c/2348103043789
    • 💬 Chat to order (prefilled): https://wa.me/2348103043789?text=Hi%20Green%20Unison%2C%20I%20want%20to%20order%20Plantain%20Flour%20for%20amala%20ogede.%20Please%20share%20your%203-minute%20whisk%20method%20ratio%20and%20delivery%20options.%20Thank%20you%21

    Pin this post so the troubleshooting section is always one scroll away.

  • From Harvest to Home: How Our Local Farmers Bring Flour to Your Plate

    Sunrise over Green Unison plantain fields and a bag of plantain flour
    Sunrise at our farm and partner fields — the first step in a long, loving journey to your plate.

    There is a certain quiet that belongs to early mornings on the farm — a hush broken only by careful footsteps and the soft rustle of broad leaves. For the people who grow our plantains, every season is a chorus of hands, heat and hope. At Green Unison we grow plantains on our own farms, and when harvests can’t meet demand we carefully source the rest from trusted organic farms that practise gentle, chemical-free care. This is their story and the slow, loving labour that turns green unripe plantain into flour that warms festive tables, comforts harmattan mornings and helps households begin the new year with light, nourishing meals.

    At dawn: where the flour’s story begins

    Our plantain journey is rooted in Ogun State — from our small family fields around Iperu Remo, to the river-kissed plots of Akaka Remo, and a nearby farm settlement where a river runs through the land. Growers on our estate, the river-fed plots and partner organic farms rise early to harvest green unripe plantains at the perfect firmness. The fruit must be green and starchy — not sweet — to make flour that cooks into a smooth elubo ogede or a comforting breakfast porridge. These lands are tended in different ways: some by our own teams, and others by partner farmers working land that has been passed down through families, held communally, or rented from families who remain the landowners. Our head office in Iperu Remo also runs irrigation systems so we can support an all-year supply of fresh unripe plantains for milling and steady kitchen tables.

    Hands and stories: the people behind the flour

    Each bunch of plantains is a work of hands — peeled with patience, sliced thin, and dehydrated using controlled low-heat methods that preserve starch structure and minimise nutrient loss. This careful dehydration reduces moisture safely, helps prevent contamination and produces slices that mill into a smooth, sand-free flour. These hands do more than harvest: they keep communities fed and households afloat. At the nearby farm settlement many cultivators bring deep knowledge of planting and harvest cycles, helping the site thrive. On our own farms and at Akaka Remo our teams work alongside partner growers; some partner plots are family-inherited, some are communal lands rented for cultivation, and others are farmsteads rented from families who remain the landowners. This mix of arrangements is part of the region’s farming fabric — and it means every bag of flour carries the care and expertise of many hands and histories.

    “Behind every spoon of our plantain flour is a full day like this — careful peeling, controlled dehydration and smooth, sand-free flour, all ready for your table.”

    The gentle art: drying and milling for flavour and texture

    Quality plantain flour is made, not rushed. After peeling and slicing, our green unripe plantain is dehydrated using controlled, low-heat methods designed for best quality retention. These methods protect the starches and colour of the fruit while reducing moisture to safe levels, so the flour mills fine and cooks quickly into a lump-free swallow.

    Slow, low-temperature dehydration reduces the need for heavy processing, preserving the texture and helping the flour cook quickly into a lump-free swallow. Once dry, the slices are milled to a fine consistency and sieved so you get a smooth, even flour every time.

    We apply the same standards whether the plantains are grown on our estate, in Akaka Remo’s river-fed plots, at the nearby settlement, or on a partner organic farm: careful harvest timing, minimal handling and a focus on preserving natural goodness. These steps — harvest timing, gentle dehydration, fine milling — are simple, but they make the difference between a flour that needs lots of sieving and one that gives you perfect amala or pancakes with minimal fuss.

    Why plantain flour is perfect for festive, harmattan and New Year tables

    The end of the year brings feasts, travel and colder, drier mornings. Plantain flour answers the moment in three ways:

    • Comforting and light: A bowl of plantain porridge or a plate of smooth amala feels warming without being heavy — helpful during busy festivities.
    • Quick and forgiving: Finely milled plantain flour cooks fast and is generally easier to work with when you’re juggling holiday plans.
    • Budget-wise and local: Choosing locally produced flour supports small farmers and often offers a friendly price point for families planning seasonal menus.

    Search interest for plantain flour shows that people are looking for reliable, local alternatives — our own pages for plantain flour are being discovered in search, which tells us many households are curious and ready to try something wholesome and familiar.

    How to cook it — simple, honest tips

    Cooking plantain flour is a small act of care. Here are practical, no-nonsense tips so your first pot is the best pot.

    1. For smooth amala (swallow): Pour boiling water into a pot and reduce the heat slightly. Sprinkle the plantain flour in slowly, whisking or stirring firmly with a wooden spoon until it forms a smooth, elastic paste. If the pack gives a recommended ratio, start with that and adjust. If uncertain, add less flour, test the texture, then add more — you can always thicken, but you cannot thin a lumped paste easily.
    2. For porridge: Mix a small amount of flour into cool water to make a paste, then pour into gently boiling milk or water while stirring. Cook for a few minutes, stirring until the porridge thickens. Top with banana, roasted groundnut or a drizzle of honey for a quick festive breakfast.
    3. For baking and snacks: Plantain flour blends beautifully in pancakes, flatbreads and quick muffins. Swap up to half of the wheat in many simple recipes for plantain flour for a lighter, earthy result.
    4. Storage: Keep the flour in an airtight container in a cool, dry place. For longer shelf life during wet or humid months, store in the fridge. Use within the best-before period on the pack and always smell and check for dampness before use.

    If you’d like a quick recipe, try our 10-minute creamy plantain porridge — a crowd favourite over the last few weeks.

    Small choices, big meaning: health, economy and care

    Choosing locally produced plantain flour is about more than a single meal. It is a gentle vote for ingredients made nearby; a way of eating that prefers simpler processing and supports families who farm the land. Whether you want something light over the festive season, a soothing breakfast for harmattan mornings, or a healthier start to the new year, this flour offers a practical, kind choice.

    We’ve also shared many ideas for plantain flour across our blog — from creative everyday recipes to tips for bakes and snacks. If you’re planning festive menus or New Year meal prep, those guides make it easy to begin.

    Ready to taste the journey?

    If you’d like to bring this flour to your kitchen, choose the Smooth Plantain Flour that’s milled for consistent, lump-free cooking:

    All of our plantains are sourced in Ogun State — from Iperu Remo, Akaka Remo and a nearby farm settlement. A river passes through the settlement’s plots, and our head office in Iperu Remo uses irrigation systems to support an all-year supply of fresh unripe plantains, so every bag carries the same promise of quality and care.

    Prefer to chat before ordering? Tap our WhatsApp catalogue or message us directly: Chat to order — 0810 304 3789 😊

    Bring the farm home this festive season — choose flour made with care.

    If this story moved you, save it for your festive planning and share it with someone who loves plantain. 🌱💚

    Related: Beyond swallow & pancakes — 5 easy plantain flour recipes · Smooth plantain flour breakfast porridge — 10 minutes

  • Clean Eating Upgrade: How to Switch Your Swallow to Plantain Flour Without Stress


    If you’ve been thinking, “I want to eat a bit cleaner, but I still want my swallow,” you’re not alone.

    Clean eating doesn’t have to mean salad every day or complicated rules. Sometimes, it’s as simple as choosing a swallow that comes from one familiar ingredient you can pronounce, cooked the same way you already love.

    That’s where plantain flour swallow comes in a simple, comforting plantain flour swallow upgrade that still feels like home.

    What Does “Clean” Mean Here?

    When we say “clean” in this context, we’re talking about:

    • Short ingredient lists
    • Familiar, minimally processed foods
    • Products you can explain in one sentence

    For swallow, that looks like:

    • A flour that is made from one main ingredient
    • No artificial colourants
    • No flavour enhancers
    • No unnecessary additives

    Plantain flour fits that picture beautifully when it’s made from carefully dried, milled unripe plantain.

    What Exactly Is Plantain Flour Swallow?

    Plantain flour swallow is made by cooking plantain flour with hot water until it becomes smooth, stretchy and moldable very similar to other swallows you already know, just with a different base.

    Good plantain flour is usually:

    • Made from peeled, dried, finely milled unripe plantains
    • Naturally free from artificial colourants
    • Neutral to slightly earthy in taste
    • Easy to pair with vegetable, fish, meat or mixed soups

    If you want a version that is already finely milled and ready for smooth swallow, you can look at:

    It’s designed for instant plantain amala-style swallow, with no sieving needed.

    Why People Call It a “Clean Eating Upgrade”

    1. Simple, clear ingredients

    When your swallow is made from just plantain flour and water, you know exactly what is on the plate. It fits nicely into a clean eating mindset where you can recognise and trust the ingredients.

    2. Familiar comfort, adjusted in a gentle way

    You still sit down with a warm plate of swallow and soup. You still tear, dip and enjoy. The routine is the same the main change is the flour you used.

    3. Easy to fit into normal life

    You don’t have to change your entire cooking style. Most of your soups stay the same. You’re just swapping the base you mould on the side.

    For many people, that’s a realistic way to “upgrade” without turning their whole kitchen upside down.

    How to Switch Your Swallow to Plantain Flour (Step by Step)

    If you’ve only ever eaten other types of swallow, trying something new can feel risky. Here’s a gentle way to start.

    Step 1: Start with a small quantity

    For the first trial:

    • Cook plantain flour for just one person, or
    • Make a mix of half plantain flour, half your usual swallow flour

    This way, the taste and texture are not a shock, and you can adjust gradually.

    Step 2: Learn the water–flour balance

    Plantain flour can behave slightly differently from other flours, so take note of:

    • How much water you boil
    • How much flour you sprinkle in
    • How long you stir on the heat

    A simple starting mini-guide (you can adjust to your preference):

    1. Bring water to a gentle boil.
    2. Reduce the heat slightly.
    3. Sprinkle in plantain flour gradually, stirring firmly with a wooden spoon.
    4. Keep mixing until it thickens and pulls away from the sides of the pot.
    5. If it’s too soft, sprinkle a little more flour. If it’s too thick, add a splash of hot water and mix in well.

    Using a finely milled option like

    Smooth Plantain Flour (Elubo Ogede)

    helps reduce lumps and makes the process quicker.

    Step 3: Pair it with soups you already love

    Don’t change everything at once. Use the same soups you normally enjoy:

    • Leafy vegetable soups
    • Pepper-based soups
    • Egusi-style soups
    • Light broths with fish or meat

    Keeping the soup familiar makes it easier to adjust to the new swallow texture.

    Step 4: Notice how it feels for you

    Pay attention to:

    • How satisfied you feel
    • How the texture feels in your mouth
    • How easy it is to finish your plate

    Everyone’s preferences are different. The goal isn’t perfection it’s finding what truly works for your own body and routine.

    Tips for Getting the Best Result with Plantain Flour Swallow

    • Use hot, not lukewarm water for cooking. It helps the flour bind properly.
    • Stir with confidence. Gentle, slow stirring can create more lumps. A firm, circular motion helps keep it smooth.
    • Cover and steam for a minute after cooking, then give it a final stir. This often improves the stretch and softness.
    • Serve it fresh. Like many swallows, plantain swallow is at its best soon after cooking.
    • Store the flour well. Keep it in an airtight container in a cool, dry cupboard, and always use a dry spoon.

    Where Plantain Flour Fits in Your Clean Eating Pantry

    Plantain flour works well alongside other simple, clean staples, for example:

    With just a few of these on your shelf, you can pull off:

    • Weeknight swallow and soup
    • Light weekend brunches
    • Pancakes or bakes using plantain flour as part of your flour mix
    • Quick thickening for certain dishes

    Gentle, Real-Life Clean Eating

    Clean eating doesn’t have to be dramatic. Sometimes, it’s just:

    • Reading the label
    • Choosing the simpler option
    • Stocking your pantry with things you actually cook with

    Switching from one type of swallow to plantain flour swallow is one of those quiet upgrades: your plate still looks familiar, but your ingredient list gets calmer and shorter.

    If you’ve been curious about plantain swallow, this might be your sign to try a small pot, taste it with your favourite soup, and see how your own body and schedule respond.

    Ready to Try the Plantain Flour Swallow Upgrade?

    When you’re ready to give it a proper test in your own kitchen, you can order directly:

    Prefer to chat first or order via message?

    Plantain flour swallow might not be the only way to enjoy a good meal, but it’s a beautiful option to have on the table especially if you’re gently moving towards cleaner, calmer, more intentional eating.

  • Guilt-Free Puff-Puff: The Plantain Flour Revolution

    Guilt-Free Puff-Puff: The Plantain Flour Revolution

    If puff-puff was part of your childhood and weekend memories — the tray at parties, the stall by the roadside and the small-chops table — you’ll know how quickly those golden balls disappear.

    You’ve probably also heard more than once that it’s “junk food” you should avoid or keep strictly for special occasions. This post offers a guilt-free approach that keeps the soul of puff-puff but uses plantain and corn flour to create a lighter, softer and more wholesome-feeling result.

    We’ll open with the cultural story, then explain why this flour mix is a smart, sustainable pantry choice, and finish with a practical, kitchen-tested recipe and trouble-shooting tips so you can make these at home today.


    Puff-puff: a snack that carries memory

    Puff-puff is more than fried dough. It is smell, celebration, and sharing — the little treat that turns up at gatherings and makes people smile. Our aim here is not to replace tradition but to add an option: enjoy a version of puff-puff that is still indulgent, still delicious, but that feels lighter on the palate and sits well with a variety of diets and cooks.


    Why the plantain flour revolution?

    People are increasingly curious about flours beyond wheat. If you’ve ever picked up plantain or corn flour and wondered what else you can do with it, this puff-puff recipe is for you.

    What plantain flour actually does in puff-puff

    When you add Smooth Plantain Flour (Elubo Ogede) to puff-puff batter, a few useful things happen:

    • Softer crumb: Plantain flour holds on to moisture, so the inside stays soft and tender even after the puff-puff cools down.
    • Gentle natural sweetness: You get a mild, earthy sweetness, which means you can keep the sugar level comfortable without losing flavour.
    • Richer colour and aroma: The natural sugars in plantain help the puff-puff take on a warm golden colour and a slightly deeper aroma.
    • Less “heavy” feeling: Compared with using only white flour, many people find this blend tastes indulgent but doesn’t sit quite as heavy after a few pieces.
    • Tasty even the next day: The plantain flour helps the texture stay pleasant when reheated, instead of going tough or dry quickly.

    In short, plantain flour doesn’t just tick a “healthier” box on paper — it changes how your puff-puff looks, smells and feels in the mouth.

    Order Smooth Plantain Flour (Elubo Ogede)

    Corn flour — wholegrain backbone

    A dash of corn flour adds body and a pleasant wholegrain note, helping the puff-puff keep shape while remaining tender.

    Order Silky White/Yellow Corn Flour

    Together, plantain and corn flours are a small revolution in the bowl — they let you keep the familiar flavour while creating a softer, less heavy bite.


    Why choose Green Unison plantain flour for this recipe?

    For this puff-puff, you want plantain flour that is:

    • Finely milled, so it blends smoothly into batter without gritty bits
    • Carefully dried, so the flavour stays clean and the flour doesn’t taste smoky or bitter
    • Consistent from bag to bag, so your results are predictable

    That’s exactly what our Smooth Plantain Flour (Elubo Ogede) is made for. It works beautifully in swallow, but it also shines in recipes like puff-puff, pancakes and waffles — so a single bag goes a long way in the kitchen.

    How much plantain flour do you need?

    This recipe uses about ½ cup of plantain flour per bowl of batter. A standard bag of Smooth Plantain Flour will comfortably cover several family batches, so you can test this puff-puff, then still have enough left for pancakes or swallow during the week.


    The sustainability and “guilt-free” angle

    Puff-puff often gets pushed into the same group as doughnuts and chips – delicious, but treated as “junk” or fast food because it is deep-fried and usually made with only white flour and sugar. Many nutrition professionals will tell you to keep those foods as occasional treats.

    That doesn’t mean puff-puff has to disappear from your plate. It just means we can be more intentional about what goes into the bowl.

    By swapping part of the white flour for plantain flour (and a little corn flour), you are still making a treat, but you are also:

    • Upgrading the ingredients. You are bringing in real plantain and maize, not just refined flour.
    • Adding natural fibre and variety. Plantain and corn flours contribute fibre and micronutrients as part of a varied diet.
    • Making the indulgence feel more thoughtful. You still get that warm, party-snack feeling, but with a recipe that feels less like an “all or nothing” compromise.

    There is also a sustainability side:

    • Support local crops. Using plantain and corn flour encourages local farming and reduces reliance on imported refined flour.
    • Variety in the pantry. Rotating flours gives your cooking new flavours and textures and moves you away from a one-flour-for-everything mindset.

    The result is a puff-puff you can enjoy with a little less guilt: same street-snack nostalgia, but ingredients that line up better with everyday wellness goals.


    Guilt-Free Puff-Puff — base recipe (serves 4–6)

    Base flour ratio

    • 1 cup plain / all-purpose flour
    • ½ cup Smooth Plantain Flour — order here
    • ½ cup Silky White/Yellow Corn Flour — order here

    Other ingredients

    • ⅓–½ cup sugar (to taste)
    • 1 tbsp instant yeast
    • ½ tsp salt
    • ½ tsp grated nutmeg (optional)
    • 1½–1¾ cups lukewarm water (add gradually)
    • 1 egg (optional — helps tenderness and structure)
    • Neutral oil, for deep-frying

    Method

    1. Activate the yeast. Stir the lukewarm water, sugar and yeast; leave 5–10 minutes until foamy.
    2. Mix dry ingredients. Whisk together all flours, salt and nutmeg.
    3. Combine. Pour the yeast mix into the dry blend, add the egg if using, and stir to a thick, scoopable batter (should fall slowly from a spoon). Add water if too stiff.
    4. Proof. Cover and leave in a warm place for 40–60 minutes, until doubled and bubbly — this gives the airy interior.
    5. Fry carefully. Heat oil on medium. Test by dropping a small spoonful of batter: it should sink then slowly rise. Fry spoonfuls in small batches, turning for even browning (a few minutes per batch).
    6. Drain & serve. Use a slotted spoon and drain on a rack or paper towel. Serve warm.

    Notes

    • Plantain flour can brown a little faster due to natural sugars — moderate the oil heat to avoid over-browning.
    • For a wheat-free version, try equal parts plantain and corn flour with 1–2 eggs; expect a softer fritter rather than the classic stretchy puff-puff texture.

    Troubleshooting & tips

    • Batter too thick? Add 2–3 tbsp lukewarm water and fold gently. You want a batter that flows slowly.
    • Puff-puff dense after frying? Either the batter was too stiff or the proofing was insufficient. Give it time to double in a warm spot.
    • Too oily? Don’t overcrowd the pot and keep oil at medium; drain well on a rack.
    • Extra lift: A small splash (1 tsp) of white vinegar or lemon juice added to the batter just before frying can give a quick reaction with baking soda if you use any — a tiny trick for extra lift.

    Serving ideas & variations

    • Spiced sweet: Add a pinch of cinnamon or orange zest for a grown-up version.
    • Savoury twist: Reduce sugar, fold in chopped herbs and a little grated cheese for a tray of savoury bites.
    • Mini party puff-puff: Make smaller balls for canapé-style serving.

    Where to buy and how to order

    Ready to try the plantain flour version? Order your flour combo on greenunison.com or send “PUFF-PUFF” to 08103043789 and we’ll help you choose pack sizes.

    Prefer to order by chat?


    Puff-puff with plantain flour – quick questions

    Can I make this without egg?
    Yes. You can leave the egg out; just keep the batter slightly looser and give it enough time to rise so it stays airy.

    Can I bake instead of frying?
    You can spoon the batter into a greased muffin tin and bake until golden. The texture will be more like soft buns than classic puff-puff, but the flavour will still be lovely.

    Can I use only plantain flour?
    You can, but the texture will be closer to a soft fritter. The plantain-plus-corn-plus-wheat blend in this recipe gives a balance of softness, stretch and shape.


    Final note

    This small plantain-flour revolution keeps the pleasure of puff-puff while offering a guilt-free option that fits modern kitchens and tastes. Play with the ratios, keep an eye on the oil, and enjoy the process — a little experimentation is how the best recipes are born.

    Disclaimer: This article provides cooking guidance and sourcing notes only. It is not medical or nutritional advice.